- Home
- Education
- Installation Tips and Guides
- Discover How to Remove Carpet From Hardwood Floors
Discover How to Remove Carpet From Hardwood Floors
Need to learn the details on how to remove carpet from hardwood floors? Discover the best ways to restore your home's flooring to its original beauty.
Homeowners of previously-owned homes often discover plush carpeting in their homes—such as in a living room or bedroom—placed over a hardwood floor. Reverting to that hardwood floor and removing the carpeting can be a good idea for many reasons. Knowing how to remove carpet from hardwood floors is not as challenging as you might think.
We'll break down the essentials before you get started so you can understand what you need to know and get the job done right.
Should You Remove Carpet From Hardwood Floors?
There are a few reasons why you might want to remove carpeting when it's been installed over a hardwood floor.
Return on Investment
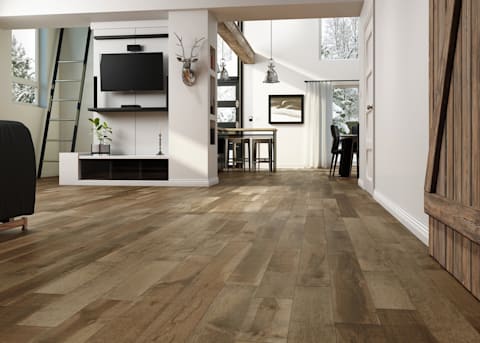
Homeowners tend to see a higher return on investment when their homes feature hardwood floors compared to homes with carpeting. Hardwood continues to be a stylish and popular choice, with buyers often loving how its rich colors and natural warmth elevate a home's charm and appeal.
Aesthetic Appeal
It's that aesthetic charm that also argues for showcasing your hardwood floors. Of course, it's an easy choice if the carpeting is worn or out of fashion. But whether your wood flooring underneath features honey blonde tones or deep coffee hues, there's a natural beauty that gives your home enhanced allure and style. The exquisite graining and texturing hardwood offers only strengthen the appeal.
Long-Lasting Performance
Another benefit hardwood floors offer is their ability to withstand everyday wear and tear for years without losing their charm or beauty—in fact, many might say that their allure only grows with time.
How to Remove Carpet From Hardwood Floors
Before you start, be aware that carpeting can often contain surprising amounts of dust and allergens. A mask can be helpful, and protective gloves can guard against rough edges and sharp nails and tacks.
1. Remove Baseboards
Even if you want to use your current baseboards with your hardwood flooring, the carpeting creates a gap between your baseboards and the hardwood, so you'll want to remove the baseboards carefully and reinstall them at the proper height. If your home originally had wood flooring, this step may be unnecessary as your baseboards may go all the way down to the original hardwood flooring. If this is the case, you can skip this step. To remove the baseboards, first slide a utility knife between the baseboard and the wall and run it along the length of the baseboard. This helps prevent your baseboard from adhering to the paint and causing a crack or break. Once free of the wall, use a small pry bar to gently remove the baseboard from the wall.
2. Cut Old Carpet into Strips
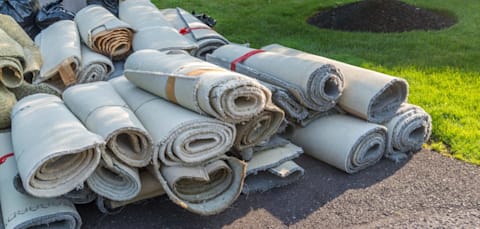
Using your utility knife, cut your carpet and padding into strips, two or three feet wide and six or eight feet long. This will help keep your old carpeting in manageable strips since most installations use minimal seams. It also gives you a place to grab the carpet when pulling it up. Once cut, roll up each section of carpeting and any padding and then tie it down with twine. Now it's easier to discard. After removing any underlying padding from hardwood floors, you're almost done.
3. Pull up Tack Strips
Once your carpeting is pulled up and removed, you'll notice a wooden strip with tacks pointing up along your room's perimeter. This tack strip helps hold the carpeting in place and should also be removed. Use the back of the head of a hammer to pull up the nails holding the tack strip down, or carefully use your pry bar to pull the strips up from the hardwood underneath. Removing staples from hardwood floors can also be done with your pry bar.

Once your tack strips are removed, remove any stuck padding or other debris with a putty knife, being careful not to scratch or scuff the hardwood. Then, all that's left is to restore the hardwood to its former glory.
How to Restore Your Hardwood
Before restoring your hardwood flooring, take the time to repair squeaks, which are generally caused by loose boards. Simply use finish screws to secure the floorboards to the joists beneath, you may need to pre-drill to avoid splitting your boards. Then, you can restore the hardwood so it's ready for use. Depending on the condition of the hardwood, this can be done quickly and easily or can be a bit more involved.
1. Fill in Holes
Good wood putty can fill in any holes caused by nails, screws, and tacks. Try to find a putty that's the same or similar color as your hardwood.
2. Sand and Finish
If your flooring needs some TLC, sanding it and applying a stain or finish may be warranted. However, if your floor's in good shape, this step can be skipped.
3. Clean It Well
Once your floor's in good shape, sweep up all the dirt and debris to clean the surface. Use a broom with a soft bristle so that it won't scratch the wood. Then clean the floor with a damp mop using a gentle cleanser to wipe away any stains or dirt. Be careful to avoid any pooling of water, which can damage your wood if exposed to it for extended periods.
4. Give It a Final Polish
Allow the floor to dry, then apply a polish to help protect the floor and bring out the graining and detail.
5. Don't Forget the Baseboards
If you've removed your baseboards, re-attach them (or find quality new ones) to the walls by hammering nails to where the boards cross your joists. Paint or touch up as necessary and you're all set.
Keep up Appearances
Taking proper care of hardwood flooring is essential to enjoy the beauty and performance it offers. Fortunately, caring for hardwood is relatively easy. Make sure to sweep periodically using a soft-bristled broom and use a damp mop and gentle cleanser to keep your floors in peak condition. Avoid pulling heavy furniture across the surface, which might cause scratches or denting, and consider placing rugs or other protection around dining tables, kitchens, and other busy areas that might see drops and spills.
That way, your home always looks sharp and ready to welcome family and guests. You'll find more ideas on how to revitalize your home with LL Flooring.
Follow LL Style on Instagram & Pinterest
ALSO, do you learn about home improvement and design with fun and informative videos? Subscribe to the LL Flooring YouTube Channel to learn more, leave comments or ideas that helped you, and join the community!


